
|
Using HTML to alter display size may not be your best option
When a photo is viewed on the web as in an eBay item description or web page, it is fetched from the hosting server by the web browser (Internet Explorer, FireFox, etc). The photo file includes within it the data necessary to display it including its width and height which the web browser reads. Using HTML it is possible to tell the web browser to display the photo at a different size than what the file information itself dictates. When doing so it's up to the web browser to figure out how best to make the photo fit into that differently sized space. That's the problem because we have no control over how good a job the web browser does with that task. Here's a screen shot of a potential poor result. The photo on the left was reduced to 281x400 and stored at that size on the server so the web browser did not need to do anything with it. The photo on the right was stored on the server at 450x640 and using HTML the web browser was told to display it at 281x400. Notice the one on the right is murky. That's the sort of thing that can happen. |
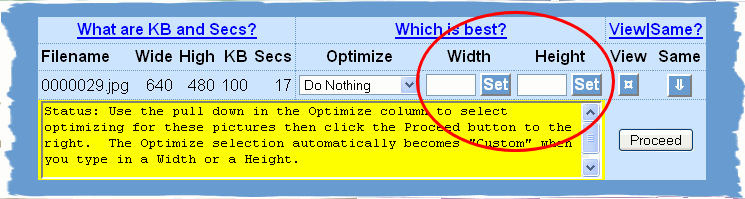
| To maintain full control over the appearance of your photos at all sizes, it is necessary to create and store them at the size you will be displaying them. If you know in advance you will always display your photos at a certain width or height you can set them to those sizes as you upload them to your EAPH web space: |
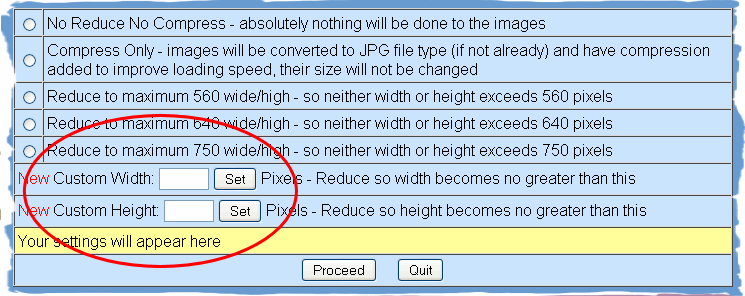
If you need more than one size of any particular photo you may create differently sized versions using the Optimize button after you upload: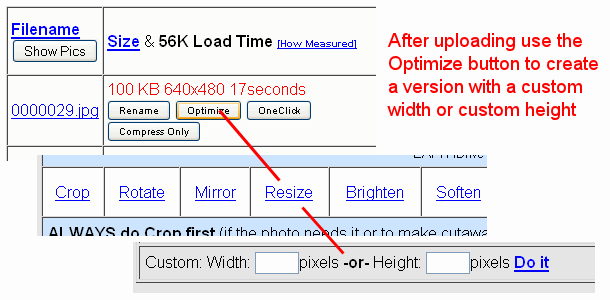
|
|
When using the Optimize tools the last step in every case is to save the new version. To retain the original version assign an altered name to the new version. What I often do is add a few letters to the back end. For example, if the original is stored with the name "Picture1" I'd add the new dimensions to the back end like this "Picture1x281x400" so I can readily see what size it is. Appending onto the back end provides for that version to appear adjacent to the original in your File Section of iDrive2.
What I suggest... As you upload decide what is the largest size you will be displaying any particular photo and set it to that size either before or as you upload using the Basic Browse or JavaUpload2 methods. Then, after you have uploaded, create whatever additional smaller sizes you will be needing using the Optimize button. That way, you remain in complete control over the appearance of your photos. |